Tuesday, May 31, 2011

Summer Bird Mask - Progress

I will be posting the progress of two masks, as requested by a client. The two masks I am making are the Summer Bird Mask, and the Wind Spirit Mask (the Wind Spirit Mask will be in the colors of the Starling Mask).

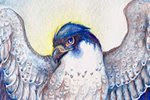
Here is the Summer Bird mask, at the stage where I cut in the lines with a swivel knife. Despite its name, the swivel knife is not a true knife, but rather a very sharp 'chisel' that digs a smooth line into wet leather.


Once the lines are in, I use beveling tools. The whole procedure up to this point is called "tooling," in which leather tools are used to shape the surface of the leather dimensionally. This is what gives feathers and leaves their depth. When working with leather, you can go to either extreme with tooling. I try to keep my tooling medium, as the painting stage also gives the illusion of depth.

Once I'm done with tooling, I cut out the edges, eyes, and in this case, the hole where the stone will be. In this photo, the mask is also partially shaped, and ready to go in the oven for final shaping and drying:


Shaping the mask is tricky, and I usually open the oven about 4 to 5 times to remove the mask and reshape it, as it can 'sag' as it dries. Here is the shaped mask, ready for dyeing, and then painting:

Tuesday, May 3, 2011

A Glimpse of Sky


At times the binds of the world are too strong. They pull and cut and hold your wings to the earth. But just as you feel ready to surrender to those biting vines, a sliver of blue pierces through the tangle above. And you find just a little strength left to pull and reach, and try to find the freedom you were certain you would never have.

Here is the finished painting, 8 X 10 inches on hot-press Fabriano. I ended up using a bit of colored pencil at the end, to really push the contrast. Since watercolor dries matte, it's difficult to get a truly dark black. Colored pencil leaves a bit of a sheen, and ends up allowing you to push your darks darker.

I took a new direction with this piece in terms of contrast and color. Looking at my previous paintings, I always used a lot of saturated colors, and very rarely actual black. I've always had it in my head that black is never to be used in watercolor, and that's simply not an accurate 'rule' to follow! Black dulls and deadens color when used in watercolor, but sometimes that's exactly what you want to achieve. Here, there's a lot of grayed color, which lends to the dark and helpless feeling. This piece would not have worked with my regular saturated palette.

In terms of contrast, I think I'm starting to get a bit more comfortable and confident with pushing values. Using the 'desaturation test,' I found the piece reads well in graytones as well as color. This is not usually the case with my work, as it often turns to a midtone mess when desaturated. I suppose what I learned with this piece is - don't be afraid to use black!

A Glimpse of Sky - Progress 2


Here is further progress on "A Glimpse of Sky." At this point, I have painted the midtones for the vines, and started putting in detail in the feathers. I am using a mixture of payne's gray and sepia as a nice neutral tone for the shadows.


More contrast for the vines, including some texture. I use a white Sakura Gelly Roll pen in places I want to lighten. The Gelly Roll pens are excellent for watercolor as they are water soluble, and can be moved around much like paint with a wet brush. They also tend to resist darkening as they dry, as white gouache does.

Here, I've started laying down layers for the falcon's coloring. Peregrines have a beautiful slate-blue coloration for their plumage. However, since only using shades of blue would keep the overall color scheme too analogous (greens and blues), I decided to introduce some purples. The wings closest to the sky are tinted with cerulean blue, blending closer to purple as the wings get darker at the bottom.

You can see where I have started detailing the markings on the feathers, using a mixture of payne's gray and indigo. The tricky part here is darkening the markings on the wings without darkening the overall wing! If I'm not careful, I'll end up losing all my contrast with the detail.

Monday, May 2, 2011

A Glimpse of Sky - Progress

As requested by a few people, I will be posting progress scans of a painting I am working on. The finished pencil drawing:


I wanted to capture a dark feeling of constriction. I decided on a muted color scheme, with the only source of vibrant color being the sky above.


I started by filling in the background with a wash of payne's gray. The midtone of the vines is a mixture of davy's gray and just a little payne's gray.

Next, I pushed the background even darker, with a layer of ivory black, and then a very concentrated mixture of payne's gray and sepia.


Once that was dry, I went over with a glaze of davy's gray mixed with just a touch of raw umber. The background will have faint vines crossing over and tangling, so I wanted the background closest to the sky to have the color of the vines. For the falcon, I created a gradated wash of payne's gray and sepia from the bottom to the top to capture the contrast of bright light and extreme dark within the vine 'cave'. As seen on three of the vines, they will be a mixture of chromium oxide green and raw sienna.