
After shaping the Summer Bird mask, I applied a layer of leather dye. The dye I use is alcohol-based, and also stiffens the leather a little bit more. Using scrap bits of leather, I cut out additional leaves, dyed and shaped them, and once dry, glued them onto the mask. Once the glue and dye is dried, I go over it with a water-based sealer (Mod Podge), to create an acid-free barrier between the dyed leather and acrylic paint. Since the dye goes on with variation, I painted a layer of burnt sienna as a 'base layer.'

You may ask, "well if this mask is going to be mostly green and yellow, why did you put a reddish base down?" I find using a color's compliment as a base serves to make that color more vibrant, as well as make its shadows more solid. As most of this mask will be shades of green, I used its compliment - red - as a base. You can see the first layer of paint, with the reddish base showing through:

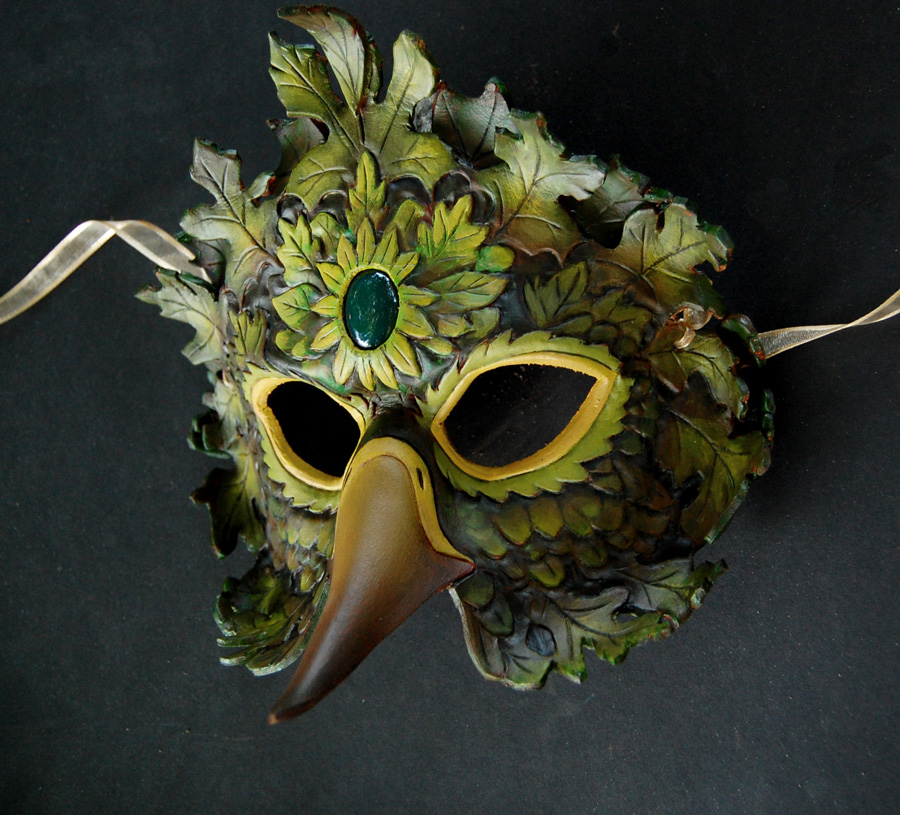
At this point, I usually work pretty fast, and my painting style isn't 'step by step' enough for me to take a lot of photos. Instead of adding shadows all at the same time and then highlights later, sometimes I go back and forth. Here is the mask completely painted, minus the stone:

As you may remember from the first version of this mask I created in 2009, I simply glued the stone on the mask without a bezel of any kind. I didn't like this for two reasons. For one, I don't feel the 'stuck on' look has a very 'clean' appearance. On the forehead, the leather is still slightly curved, and the flat back of the cabochon does not sit perfectly flat, and thus you get gaps. The second reason is stability. Although the adhesive I use (Incredible Goop) is extremely strong, a stone that is simply stuck on is not as secure as one that is 'set' in the mask. Because of this, I decided to take a different approach.
I must thank Andrea Masse-Tognetti, known more widely as Merimask, for her tips on how to set a stone in leather. During the tooling stage, I traced the base of the stone on the leather, and then drew a second, identical oval about 1/16 of an inch in, so the hole would be slightly smaller than the base of the cabochon. After cutting out the hole, I beveled the hole inversely, meaning it would be wider on the bottom and narrower on the top. This way, it would act as a bezel over the stone.
Once the mask was shaped, painted, and ready for varnishing, I placed the stone in the hole and cut out a very thin piece of split leather. The leather I buy is regularly 11 ounces (leather thickness is measured in ounces), which is a little under 3/16 of an inch. This is very thick for leather, so for my masks, I ask the tannery where I buy my leather to cut it down to 7 oz. (a little less than 1/8 inch). By request, they sent me the thin split side, which comes in useful for things such as backing stones, as seen below:

I cut this piece big enough so I could glue it (with the Goop, again) to the back of the mask. I made sure the Goop covered both the piece of leather, and the stone, so once it dried, the stone would be set without wiggling.

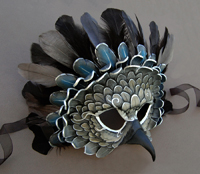
I also placed sticky-backed felt over the glued-on leaves, so they wouldn't dig in or scratch the wearer's face. After a day of drying, I varnished the mask, front and back, twice, and tied on the ribbons.
No comments:
Post a Comment