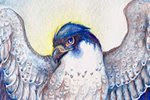
This mask looks huge when tooling, as it takes a rather large piece of leather. However, the wings wrap around the head, so it is not as 'huge' as one might think by looking at it at the tooling stage. Below, you can see the mask fully tooled and cut out:

Once shaped, you can see how it loses a lot of its volume, but becomes a very well-fitted mask:

I use blue dye, because this will be a dark mask. Although in my previous post I mentioned using a compliment as the base dye color (as with the Summer Bird Mask), in this case, I felt using blue would work better. There are no set-in-stone 'rules' when I work. If I feel something will work better, I generally follow my instincts:

I try to use the base color of blue as a springboard for my other colors. This mask will vary between green, blue, and purple, so I use thin layers mixed with a pearlescent white to create an iridescent effect:

Since punching holes for the ribbons would ruin the winged effect of this mask, I instead glued a piece of leather with a hole on each side, and threaded the ribbon through. Since the adhesive is extremely strong, I do not worry about it pulling loose. One 'test' I do whenever I glue something that will be tugged on a lot (such as ribbon) is I pull it firmly. If I feel or see any give, I reglue it. Both sides passed the 'tug test', and after varnishing, this mask was complete, and was sent on its way to the client.


Ooo so lovely to see this particular mask in progress! You wouldn't perchance have a photo of the tags you glued on to poke the holes in? You and Andrea both mention this method, but I don't think either of you have uploaded pictures. I'm deathly curious to see the shape of those tags and how they attach.
ReplyDeleteRandomly, I just love this mask as it is while it's flat! What gorgeous detail. It could almost work just hanging it up in a frame like that. *_*